Rc Drones are nowadays is very popular among peoples. I think the main reason is those RTF (ready-to-fly) small commercial drones such as DJI Phantom/Mavic.
Actually, who doesn’t like FPV (first-person view) right? like a bird.
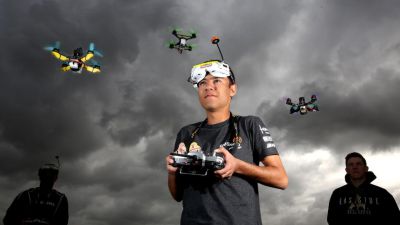
As a reader of RC DIY DRONES, you may already know what a drone is? and what it’s capable of. So this is the reason those RTF drones on the market are very popular nowadays.
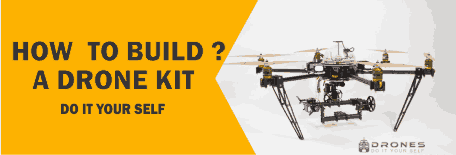
Now you are going to learn how to make RC drones in a home by yourself.
Today, people who wondering to make a drone from scratch, there are so many DIY drone kits on the market and online shopping sites like eBay.
And assemble it simply by watching a youtube video like pice of cake.
By the way, I’m not going to tell you how to make RC drone from step by step without using any of those kits.
Parts you’d need to build a rc drone
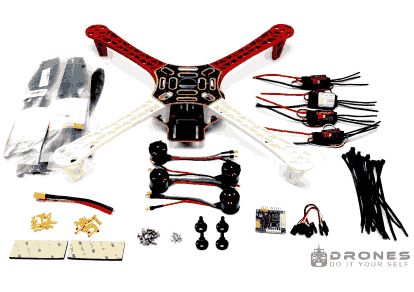
Before start our project, you need to know witch parts are needed to build your drone or multicopter.
Here are the basic parts you’ll need in order to build a drone.
Rc Drone Frames
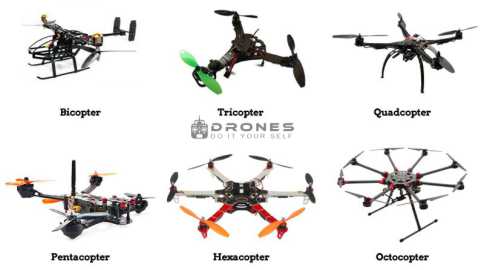
When we talking about frames there are lots of frame design types. Before selecting the frame,
you should have a better understanding of your purpose. For example, If you want to carry more payload,
better be going with a Hexa or octa frame size. If you can’t understand I suggest checking out my article about (best drone frames).
Also, there are two possible ways when it comes to framing for your drone. You can make it yourself or buy it in an online store.
There are a huge collection of frame types in online shopping sites and If you f you decide to build it yourself, the project is not that difficult,
but you’ll need some knowledge and also I saw there are some articles on the internet about how to make drone frames at home.
Motors
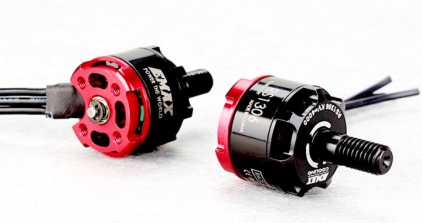
Motors are the main mechanical component in our drone and you’ll need motors for every one of those rotors.
My opinion is to buy an extra motor as a spare.
Nowadays most drone makers using brushless motors for there models. There are so many reasons for that such as lightweight and power efficiency.
These motors you can buy from the store. You can also get more knowledge about them by reading our article about drone motors.
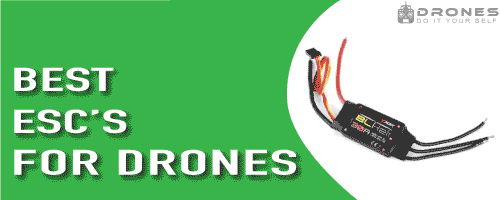
Electronic speed controllers (ESC)
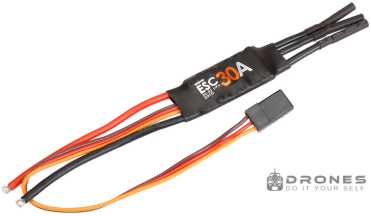
These are also essential electronic components of your drone. Their main role is delivering power to the motors by getting
commands from the flight controller. The amount of ESCs depended on your drone or multi-copter rotor count. If you want more details about ESC’s check my previous article How to chose correct ESC’s for drone.
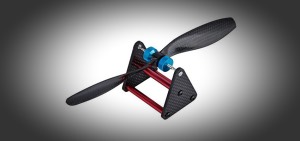
Propellers
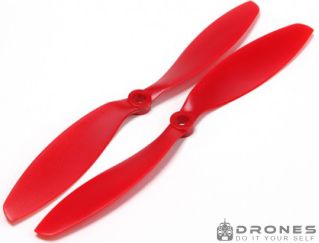
When looking for propellers, the most important part is its size and material.
You must find the ones that match your motor and frame type of your drone.
Also, the material is important and there are a lot of cheap propellers on the market, so you must make sure the ones you choose are a good fit.
For more details check my article How to choose propellers to the drone.
Li-po Battery
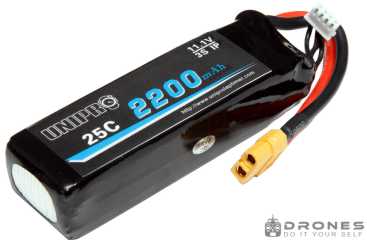
Maybe you already know we are using lithium polymer (Li-poly) batteries as the main power source of our drone.
When purchasing the batteries for your drone, you need to consider the capacity of a battery and its type. Capacity depending on the weight of the battery,
weight is playing a big role in our drone project. So you need to very careful when selecting a battery.
To have a much better insight on this topic, we strongly suggest checking out our article about drone batteries.
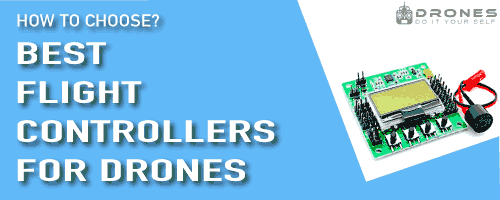
Flight controller
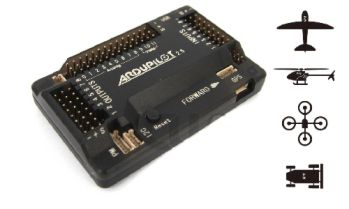
Every flying drone must have a control system. FC’s main role is taking instructions from the user(pilot) via remote controller and giving orders to ESC’s to, fly the drone as you wish.
I’m not going to deeply describe here about flight controller. I suggest you read my article on how to select a flight controller.
Remort controller and receiver
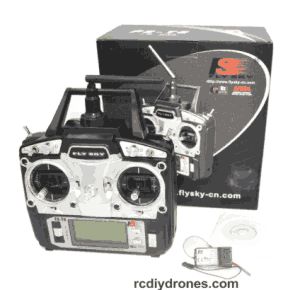
The remote controller and receiver system is needed to control a drone. In the drone industry, people use radio frequency to transmit data.
One of the reasons is we can use it longer range rather than a Wi-Fi signal or something. There are a lot of TX/RX systems on the market.
I suggest you buy a one with more than 5 channels to get better support. In the future, I’ll tell you about those channels.
Connectors
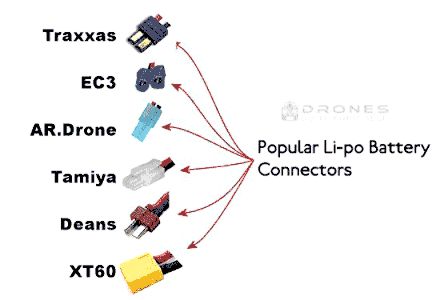
Connectors will help you to connect electronic components together easily without soldering.
You will need – 3.5 mm connectors to weld the motors and ESCs
– T plug or XT-60 Connectors to connect battery and power distribution board.
Note : These are optional but with these your project will get more perfect and easy.
Battery monitor
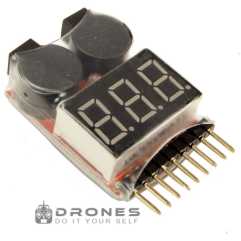
This is also optional item, but battery monitor is quite useful in warning you when the batteries power level is critical.
Shock absorbing pad

It reduces the vibrations, and thus improves the flight. So with this item, your drone will be more stable, because vibrations affect badly for your flight.
Aside from the above-mentioned parts you will also need –
AWG silicone wires
Li-po battery balanced charger
Servo lead wire cables
zip ties
The parts I mentioned above is very important to every drone must contain in order to work and fly.
Let’s Do This Step-By-Step
As a follower of rcdiydrones.com, you may already know there different types of drones,
but among most of the people, quadcopters are very popular and also easy to fly.
That’s the main reason I’m going to tell you about, how to build a quadcopter by yourself step-by-step.
Before I start, I’m consuming that you already purchased those components, I mentioned above.
First of all, I have to say, The parts I used here may not be the same to you, but what I’m doing here
is quite similar to all of the homemade drones.
STEP 1: ASSEMBLING THE FRAME
The frame model I use here is the DJI F450 quadcopter frame, You’ll see this is a plastic frame and this is the lite weight.
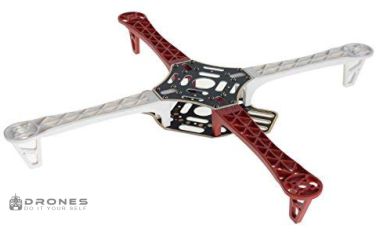
This package has 4 arms / 2 base plates / 2 sizes of Allen screws. You have to connect them, It’s easy.
Watch the image of the F450 frame, get those two plates and arms as the image.
Then connect them by using those screws.
STEP 2: PROPELLERS, ELECTRONIC SPEED CONTROLLERS, AND MOTORS
The ESCs (Electronic Speed Controllers), the motors, and the propellers are the most important components
of a flying drone. So, you should be careful when choosing these items. My opinion is before buying these parts check out our “Build” article section
to getter super understanding.
When looking for the motors and propellers, I assume that you already have chosen the right motor propeller combination for your project.
I use here Emax x2212 935kv motor with 9045 carbon-fiber propellers, the reason I choose this one is,
this kv rate and required voltage capacity are good enough for hover my quadcopter well and carbon fiber is lightweight and strong.
ESCs(Electronic speed controllers) that I use here are Emax 30A ESCs. The reason is, this ESC can use for 3s-4s lipo battery and when at the full throttle,
my motor needs about 15A current. So for the safe side, I recommend here you to when before buying an ESC,
read your motor max input current and select the ESC two times larger than that number.
For the record, there are also 4 in 1 ESC on the market.
That’s easy to fix but if there any fault on the circuit, the whole ESC maybe does not function. By the way, the choice is yours.
OK, Let’s get into work.
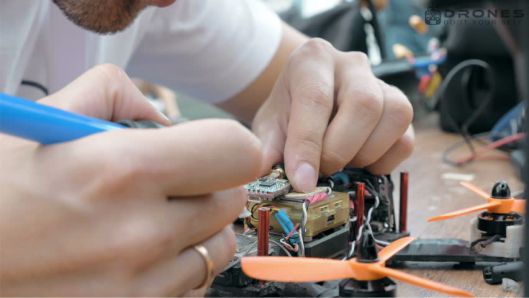
Grab the one by one motor and bullet connectors, using soldering iron and sold those three wires to male bullet connectors.
Again do the same to the ESCs, sold those three ESC wires into female bullet connectors.
Note: Some Motors and ESC manufacture making their motors and ESC that already have solders connectors. So you don’t need to do it.
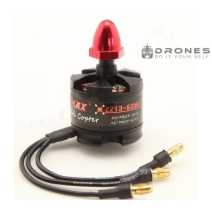
STEP 3: CONNECT THE MOTORS TO FRAME
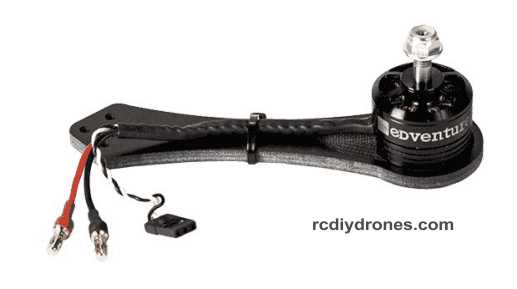
As I mentioned above, I have chosen EMAX X2212 935KV brushless motors. This package includes screws for motors,
Just you need to do is, grab those motors plus screws and fit those into four rotors(if it is a quadcopter).
STEP 4: CONNECTING THE FLIGHT CONTROLLER
For our homemade drone project, I’m using here KK2.X Flight controller.
The main reason I have chosen this is, It’s very cheap and no need for a computer or external programmer to set up. Because It has an inbuilt
LCD display and buttons to setup.
The first thing to do is, place the “FC” center of your drone and level it horizontally to get better stability and performance. To avoid vibration, you can use a
vibration damping plate as the image below.

Wiring the flight controller
Ok, now you can see there are servo wire connecting pins on your “FC” (see the image below)
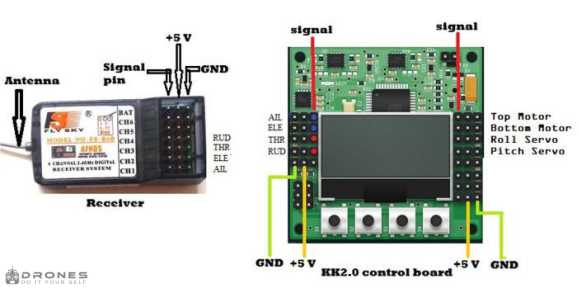
Wire these together as the image below and for getting a better understanding watch this video.
Configuring the flight controller:
Now you have to configure the flight controller for your drone model.
This is a little bit difficult to write, so watch this video A to Z carefully and do the work as it is.
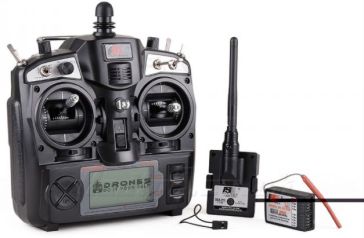
STEP 5: SETUP RX and TX
Transmitter and receiver is essential equipment for remotely controlled drone. There are lot of brands and manufacturers every ware.
Transmitter and receiver are essential equipment for the remotely controlled drone. There are a lot of brands and manufacturers every ware.
Today I’m using here fly-sky TH9X TX/RX because It’s worth money and durable.
Setting up the receiver:
Place your RX near the flight controller and connect jumper wires as the image below.
Don’t forget to place the Rx antenna facing downward of your RC drone. I recommend you to tie it to your RC drone’s landing gear.
In this post, I covered all of the major steps to make RC drone from scratch step by step. I’m putting here some videos to get more knowledge.
Conclusion
In this article, I managed to briefly cover the pieces steps to make RC drone or quadcopter at home, but if you want to learn more, there are also many “intermediate steps” in addition to the basic steps we just described.
Please check out our build category to get more knowledge about RC Drones.